Thursday 24 November 2016

Jargon busting


I thought some of you may appreciate a bit of jargon busting!


Sewing, as with many crafts and hobbies, seems to have its own vocabulary, so lets see if I can translate a few of the most common terms.


Grain:

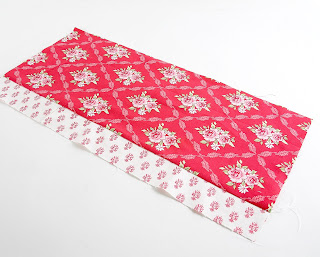
This is the direction of the fabric, the north and south if you like, as the fabric comes off the roll with the selvedge either side.


Cross grain:

If the grain is the north and south, this is the east and west, so the cross grain is the direction from side to side.


Bias:

This is the 45 degree angle to the straight line. Bias tape is strips of fabric cut at this angle, as bias cutting creates a bit of stretch in the fabric, so when trimming anything with a curve, the bias tape won’t pucker.


Selvedge:


The selvedge is the term for the edges of the fabric, where the thread has been looped back to stop the fabric from unravelling. Some manufacturers will print the brand name here, and a reference to the colours used in the print. Always cut off the selvedge before you start a project as the weave tends to be slightly different to the fabric, but take a good look at it before you throw it away, some selvedges make lovely trims!


Warp:

The threads in your woven fabric that go up and down.


Weft:

The threads that go across your fabric. An easy way to remember is that these threads go ‘weft to right’.


Pre-wash:

Washing and drying your fabric before you start to sew will eliminate shrinkage in your finished project, so wash it in the same way as you would wash your finished item. That said, I don’t wash bags or cushion covers, I spot clean them if they get dirty, so wouldn’t pre wash in this case. The feel of you fabric may be a little softer  after washing as the sizing is washed away, if you like the crispness, use a little spray starch when you iron it. If you’re concerned about colours running, uncommon unless your fabric is red or purple, then just cut a small piece and soak it in warm soapy water for half an hour or so. Whilst still wet, place on some white kitchen roll and you’ll soon see if the colour’s running!


Bolt:

Fabric sold on a flat cardboard tube, the material is usually folded in half.


Fat quarter:

Take a meter or yard of fabric and cut it in half lengthways, then in half again widthways, and you’ll have four pieces of fabric that measure around 18” x 22”. These are fat quarters. If you cut one of these pieces in half lengthways, you have a fat eighth.

Fat quarters are commonly sold in packs of co-ordinating colours and prints, such a good idea as you know they’re all going to match!


Jelly roll:

A roll of 2 ½” wide individual strips of co-ordinating fabric, usually used in patchwork and quilting. The pre-cut strips can be cut into squares, diamonds and triangles, or used for sashing [the strips that separate quilt blocks].


Layer cake/charm pack

These are pre-cut squares of fabric in co-ordinating colours and patterns. A layer cake is made up of 10” squares, a charm pack is 5” squares.


Wednesday 23 November 2016

One of my first makes

 
This is my well loved teddy wearing a trendy paisley waistcoat I made when I was about eight years old! Ted must be 55 now, he used to be furry with leather patches on his paws, they've worn away now and you can see how I knitted patches at one point to repair him!


Sunday 20 November 2016

Girls day out!


I had a lovely day out with my daughter and grand daughter at Eureka in Halifax on Friday, we had snow in Hebden Bridge [the ducks seemed to enjoy it!] hail in Halifax, rain on the way home and a little bit of sunshine, all weathers covered!


Wednesday 16 November 2016

Old photos

 
Here's  few pictures from the start of my tv career, CITV 1986! I remember that waist!


Tuesday 15 November 2016

Vintage style bucket bag project


This is a Vintage style Drawstring Bucket Bag I designed for Simple Home Made magazine, hope you like it!


This pretty bag would be useful to store sewing items, for the nursery of for cosmetics!


You will need:

·         2 circles of fabric, one outer and one lining, measuring 8” across

·         2 rectangles of fabric, one outer and one lining, measuring 25” x 7”

·         1 circle of foam stabiliser measuring 7” across

·         1 length of foam stabiliser measuring 24” x 6”

·         2 rectangles of fabric, one outer and one lining for the drawstring section measuring 25” x 5”

·         30” of ¼” wide ribbon

·         25” of lace, or ribbon if you prefer, to decorate

·         For the handle, 1 strip of foam stabiliser measuring ½” x 13”

·         One strip of fabric measuring 2” x 14”

·         2 buttons

·         Repositionable spray fabric adhesive


1.       Fuse the stabiliser centrally to the wrong sides of the outer circle and side fabric pieces.


2.       Decorate the outer panel with lace, ribbon or whatever you choose.


3.       Sew the two drawstring sections right sides together along the top edge. Open out and press, then hem the two short edges by folding the fabric over ¼” then ¼” again and stitching.


4.       Fold in half and press along the seam. Sew ½” from the fold to make a channel for the drawstring.


5.       Edge stitch along the hemmed sides, avoiding the channel. Sandwich this panel centrally in between the outer and lining sections, and sew across the top.


6.       Fold the whole panel right sides together and sew along the side. Leave a gap in the lining for turning.


7.       Pin, then sew the two circular bases in place.


8.       Turn the right way out, and sew the gap closed. Push the lining inside the bag and press.


9.       Use a bodkin or safety pin to thread the ribbon through the channel.


10.   To make the handle, spray the strip of foam stabiliser with repositionable adhesive, and wrap the fabric around it, tucking in all raw edges. Sew straight down the centre.


11.   Sew the handle to each side of the top of the bag with strong thread, then add a button to hide your stitches.


Monday 14 November 2016

Christmas stocking tutorial video


If you havn't seen it yet, here's the link to the Christmas stocking tutorial I put on You Tube last week, a great way of using up scraps and jelly rolls!
 
 
 click Christmas stocking!

Sandra's bags

I met Sandra a few months ago at a demo day in Newton Aycliffe, she proudly brought in the faux leather bags and smocked cushion she'd made from my patterns, I love her quilting and the little pearl beads she added, one talented lady!

Saturday 12 November 2016

Upcycled shirt to skirt!


I bought this shirt from a charity shop for £4.50, you’ll need one with long sleeves to make the waistband, and choose a shirt much larger than you’d actually wear!


1.       Press the shirt, lay it on a flat surface and cut straight across, just under the sleeves.


2.     Cut 4” strips from the sleeves, you’ll probably need to join a few together to make the waistband.
 
3.
  Measure your waist. Cut the waistband fabric 2” longer than your waist measurement. Fold the ends over by ½” and press. Fold the fabric in half and mark the centre point, do the same with the shirt. Pin these two points with the fabric right sides together. Pin the end of the waistband to the end of the shirt, and make even pleats in the shirt to make it the same length as the waistband.


4.       Repeat with the other half of the shirt, making the pleats face the opposite direction. Try to keep all the pleats the same distance apart. This is a bit time consuming but your skirt will look better for it! Sew the waistband to the shirt. [Which I’ll now call a skirt!] Fold over the raw edge of the waistband by ½” and press.


  5. Fold the waistband in half and press. Sew from the right side, you’ll find your stitches will be neater. Sew a button hole on one end of the waistband,
 

5.  And attach a button [from the scrap pieces of shirt] to the opposite end.


6. And hey! You’ve transformed a shirt to a skirt!


Tuesday 8 November 2016

another cat enjoying the warmth!!


There's under floor heating in the kitchen too!

Christmas tree ornament tutorial


 This sweet little tree will brighten up your Christmas table, and makes a useful pin cushion too!


1. cut a strip of light fabric measuring  12" x 1.5" and sew it to the bottom of a strip of dark fabric measuring 12" x 45."

2. cut out 4 triangles measuring 4" across the bottom and 6" tall
3. sew the triangles right sides together in pairs, leaving a gap in the base of about 1"
4. snip off the point and turn the right side out.
5. sew these two triangles together with one line of stitching straight down the centre.

6. stuff with toy filler
7. take a 10" length of dowelling and wrap a length of ribbon around it. [or you can skip the stalk and glue the tree straight to the top of a pot]
8, push the stick in between the triangles and secure with a bit of glue, then hand sew the openings closed.
9. take a small pot and push either oasis, pebbles or clay into the base, then the tree goes straight into the centre. If you're using pebbles, drizzle glue over the top to stop it falling out, decorate with buttons.

10. I found a heart shapes pin that is just the finishing touch!